Tuesday, March 24, 2020

Hunkered down - producing face masks

Well, the trip to England is postponed due to the coronavirus(covid19) outbreak. Just sitting around or just making pretty things leaves me feeling detached and helpless. So, I'm trying to be helpful by sewing face masks.
I used several tutorials and videos and made some adaptations to the pattern I'm using. I basically do this one (her image below):


But with a few modifications.
1) I cut 9"x14" to make the mask a little bigger. I use 7" of elastic.

2) When mass producing masks (lots of 4-8 are practical) I don't cut individual strips, I just make one long strip and cut it to length when pinning it in place. 6" is too long so there is a little bit of waste if you cut them first.

3) The mask above has no slit for a filter (such as a piece of vacuum cleaner bag or even a used dryer sheet) but it is very easy to make one:
 a) First step is to narrow hem both short ends,
 b) then when sewing that first seam, only sew 2" on either end, leaving a gap in the middle(see image below for result).
 c) When turning the mask, offset the slit from the very bottom. I have it face up near the bottom when making the tucks.

Another mass-production tip is to do each step for all the masks at once. I take this to the extreme and sew one side of the seam with the slit on each mask without cutting the thread, then do the other side. Similarly with the elastic I sew one corner on each mask without cutting the thread, then cut them apart and do the other end of that elastic, then the other side the same way. It takes a little maneuvering but saves thread and lot of thread clipping. Sometimes it makes sense to clip the string of masks apart between steps and sometimes not.


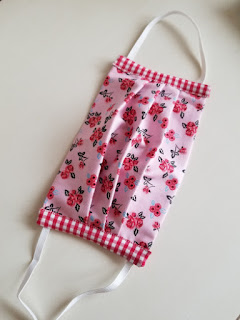
Here are some images of my masks in progress:
 Opps, that bottom image is 'upside down'. The slit goes toward the bottom, inside of the mask.
 Below is a closeup of the band, after stitching it to the mask, see how it is folded around the ends.
The band is turned out to enclose the raw edges, I often clean up any loose threads and trim the seam a bit before this step.


Wednesday, March 4, 2020

Made the scarf and...

Finally finished the entrelac scarf! Part of the reason was that I was working on a wallet and bag for my upcoming trip to London.
Knitting the scarf was an amazing experience. Entrelac is a fun technique/stitch. One thing about it is that one is constantly turning the work. I got bored with that and the result was I taught myself to 'perl back' without turning! This resulted in my teaching myself to knit left handed! After knitting for over 50 years this is quite a revelation. I hope I can apply it to my next project(the green yarns from my previous post).
It looks difficult but it is not. Just a lot of picking up stitches and turning, unless you can learn to go back and forth without turning. Pardon the random rainbows. There are prisms in the window.

Meanwhile, I'm in search of the perfect bag for my trip to London to visit cousins in a couple of weeks.
I found a great piece of fabric in my stash and purchased coordinating brown strap material, the trim, and the batik lining which isn't visible here.
Oops, I haven't tacked the boxed corners yet! You can't see the lining or the fact that it is a double bag. I love the stitching on the strap! I need to add some zipper pulls. I used this pattern. which I altered a bit. Didn't do as good a job on the zippers. Need more practice.
Also I made this cute wallet from this pattern:


But I think I'm going to make another wallet from the bag's lining fabric, which is marvelous. I used a thick fabric and didn't have the proper stiffener, but now I do. This makes a nice clutch but is bulky in the bag. Stay tuned for a post with the results and a picture of the inside of the bag.